
Refunds
Issue full or partial refunds from the Ozow Dashboard, no code required.
On this page9 sections
You can issue refunds to customers directly from the Ozow Portal without writing any code. No code refunds allow you to refund a completed payment back to the customer, either in full or partially.
FloatFloat The balance held with Ozow that payouts and refunds are paid out of. Both draw on it, and neither will process while it is empty. Payins do not need one, so if you only take payments you never meet it. required
Refunds are funded from your Ozow float. Make sure your float has sufficient funds before issuing a refund. See the Float top-up guide.
Single refunds only
No code refunds are processed one transaction at a time. There is no bulk refund option via the Ozow Portal. If you need to issue refunds programmatically or in bulk, see Refunds a Payment.
Before you start
- You need access to the Ozow Portal at dash.ozow.com
- Refunds must be enabled on your account, if you don't see the refund buttons on a transaction, contact support@ozow.com or your account manager to request access
- Only completed transactions can be refunded, pending or cancelled transactions cannot be refunded
- Your Ozow float must have sufficient funds to cover the refund amount
- By default, transactions can only be refunded within 14 days of the original payment. Contact support@ozow.com or reach out to your account manager if you need a longer refund window (up to 360 days)
How to issue a refund
Step 1: Find the transaction
Log in to your Ozow Portal at dash.ozow.com.
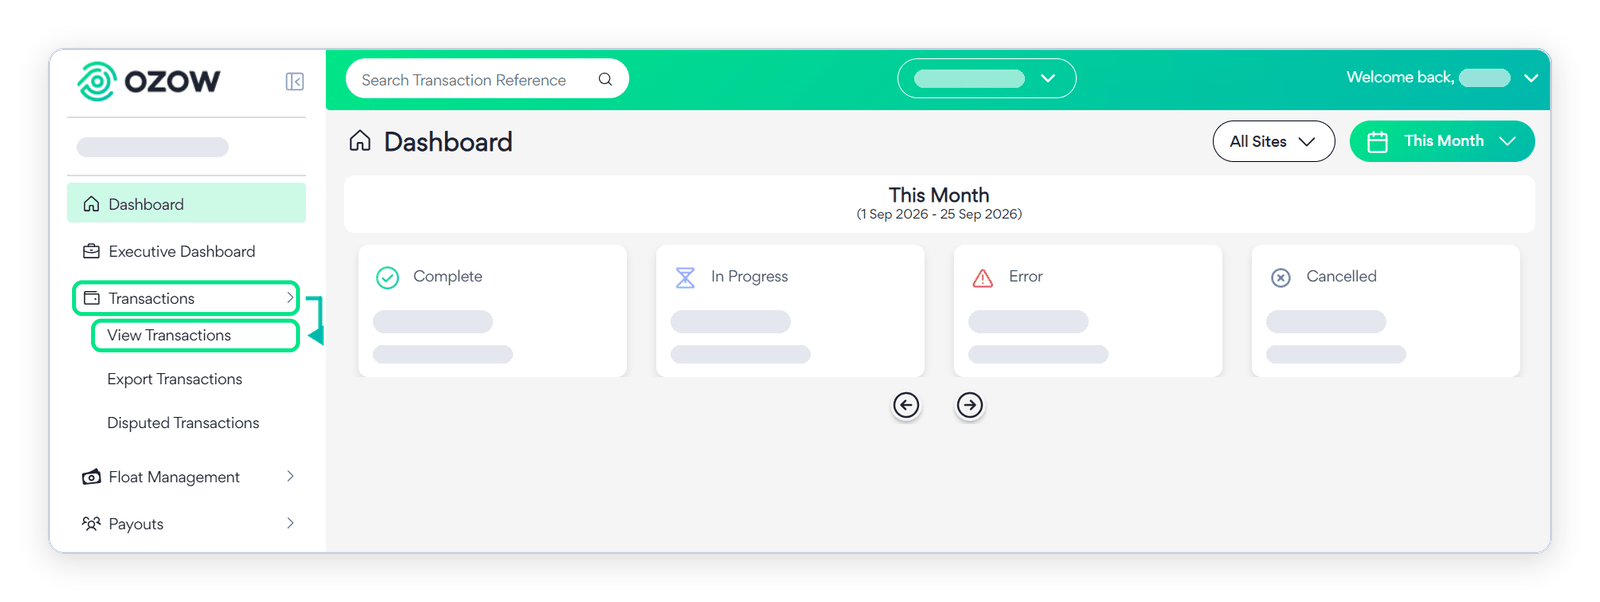
In the left-hand navigation menu, go to Transactions → View Transactions.
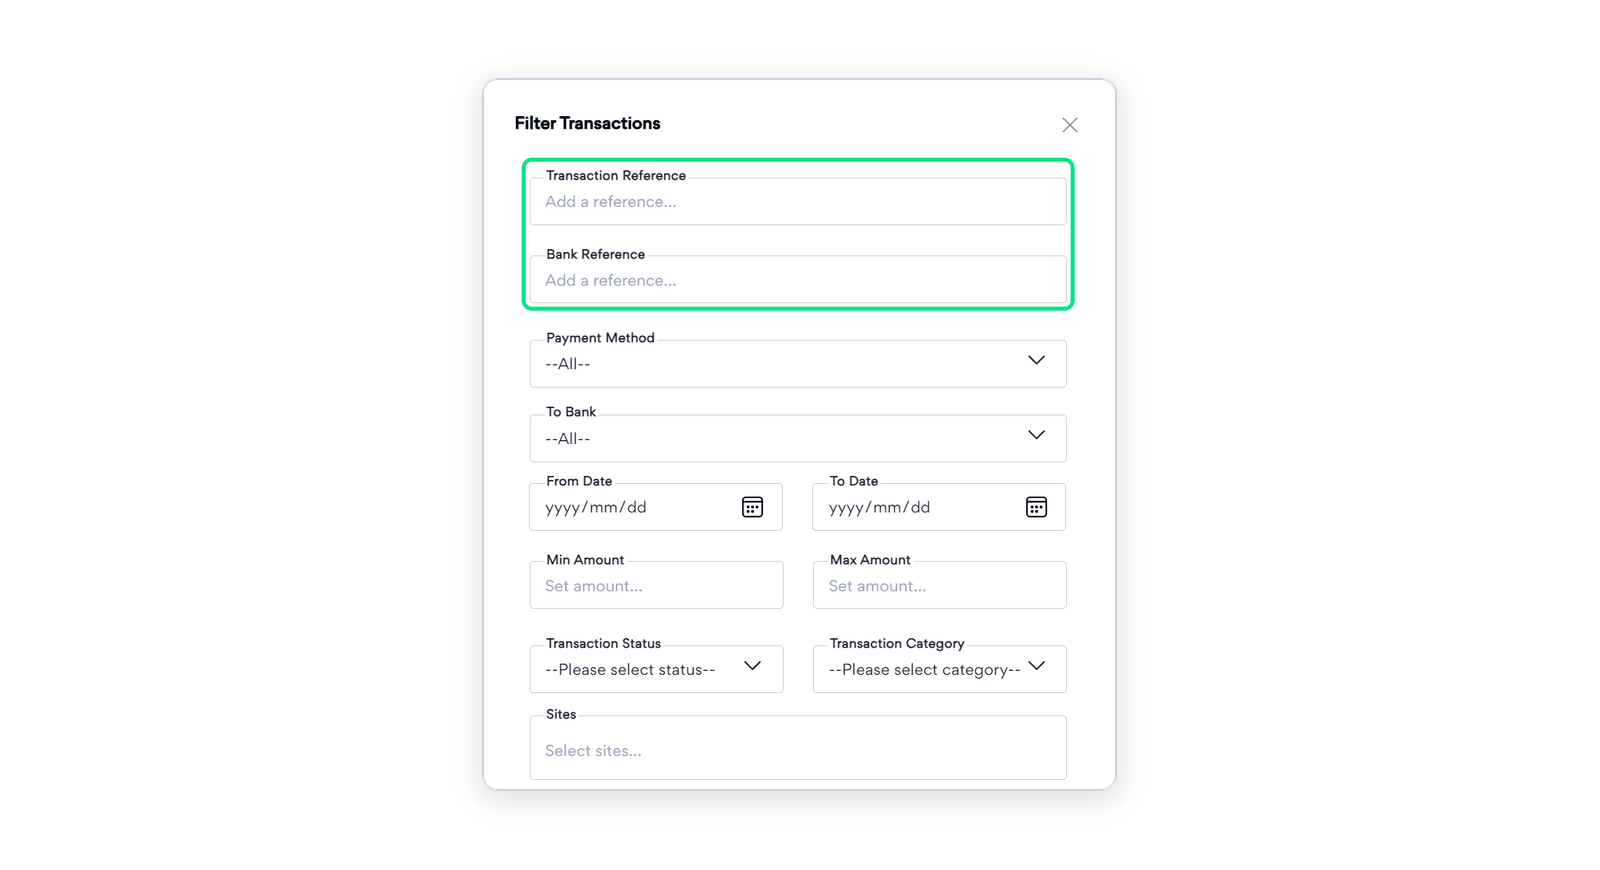
Use the available filters to find the transaction you want to refund. You can search by transaction reference, bank reference, or other available filters.
Step 2: Open the transaction details
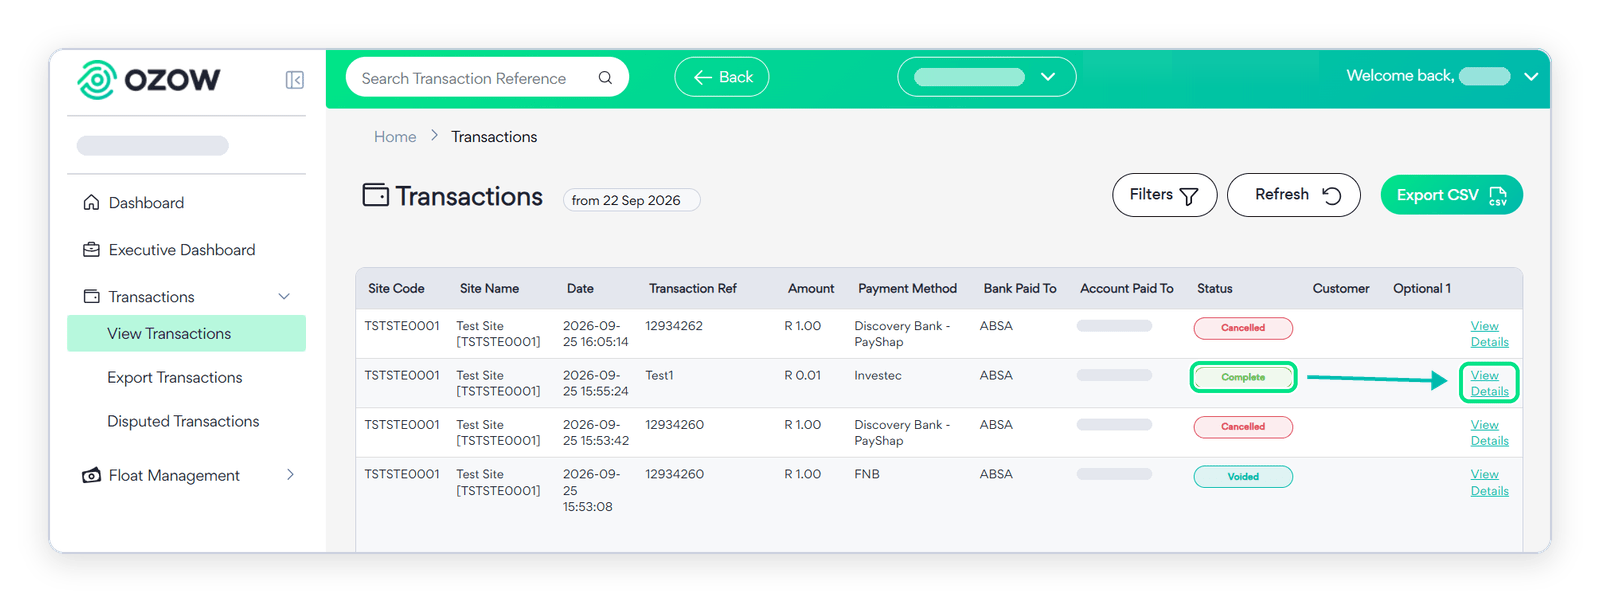
Once you have found the transaction, click View Details on the right-hand side of the transaction row.
Step 3: Start the refund
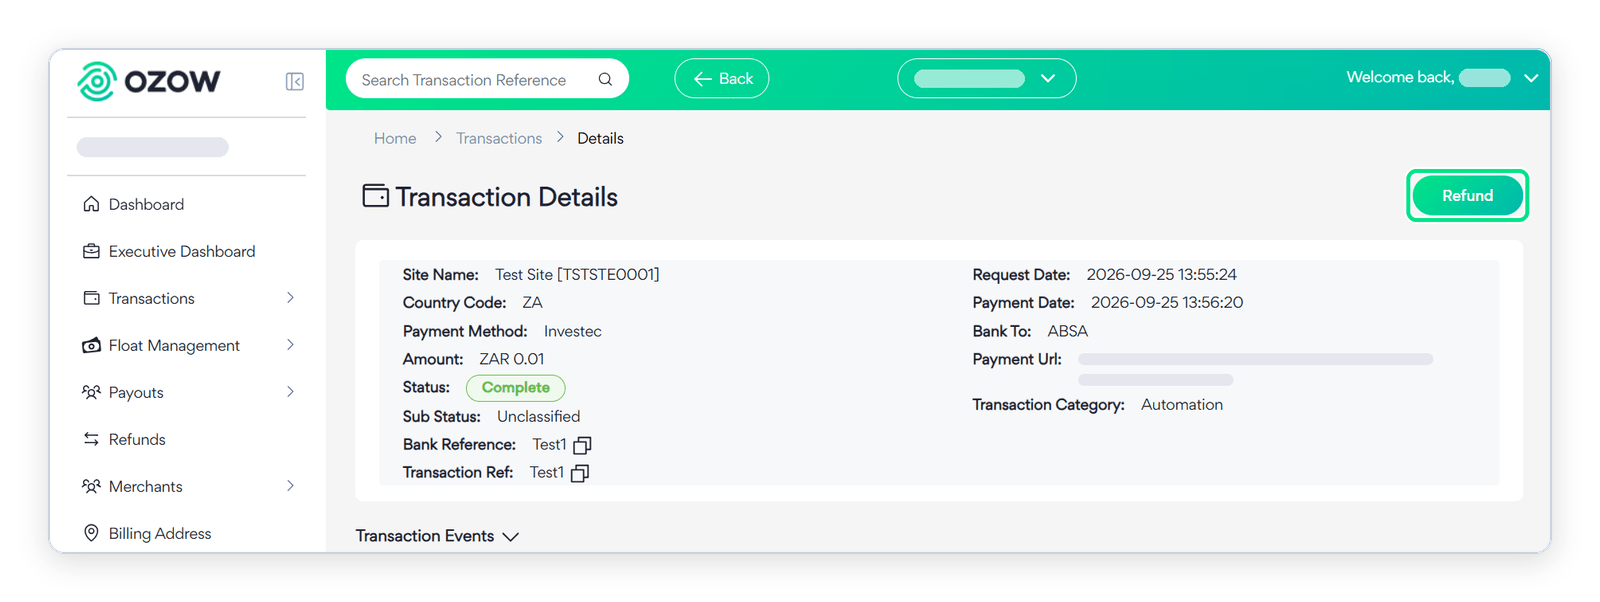
On the transaction details screen, click the Refund button in the top left.
Refunds always go back through the original payment method.
You can't change where the refund is sent. For example, a card, Apple Pay or Google Pay payment must be refunded to the card and cannot be refunded by EFTEFT A transfer between two bank accounts. Used here for the standard kind, which takes one to two business days, as against Real-Time Clearing, which moves the funds immediately. A payout or refund is one or the other, and which you choose is the difference between a customer waiting minutes and waiting days. to a bank account. Pay by bankPay by Bank The payer authorises the payment inside their own banking app or online banking, and the funds move from their bank account. No card is involved and no card details are entered. payments are refunded to the bank account linked to the original payment.
Step 4: Enter the refund details
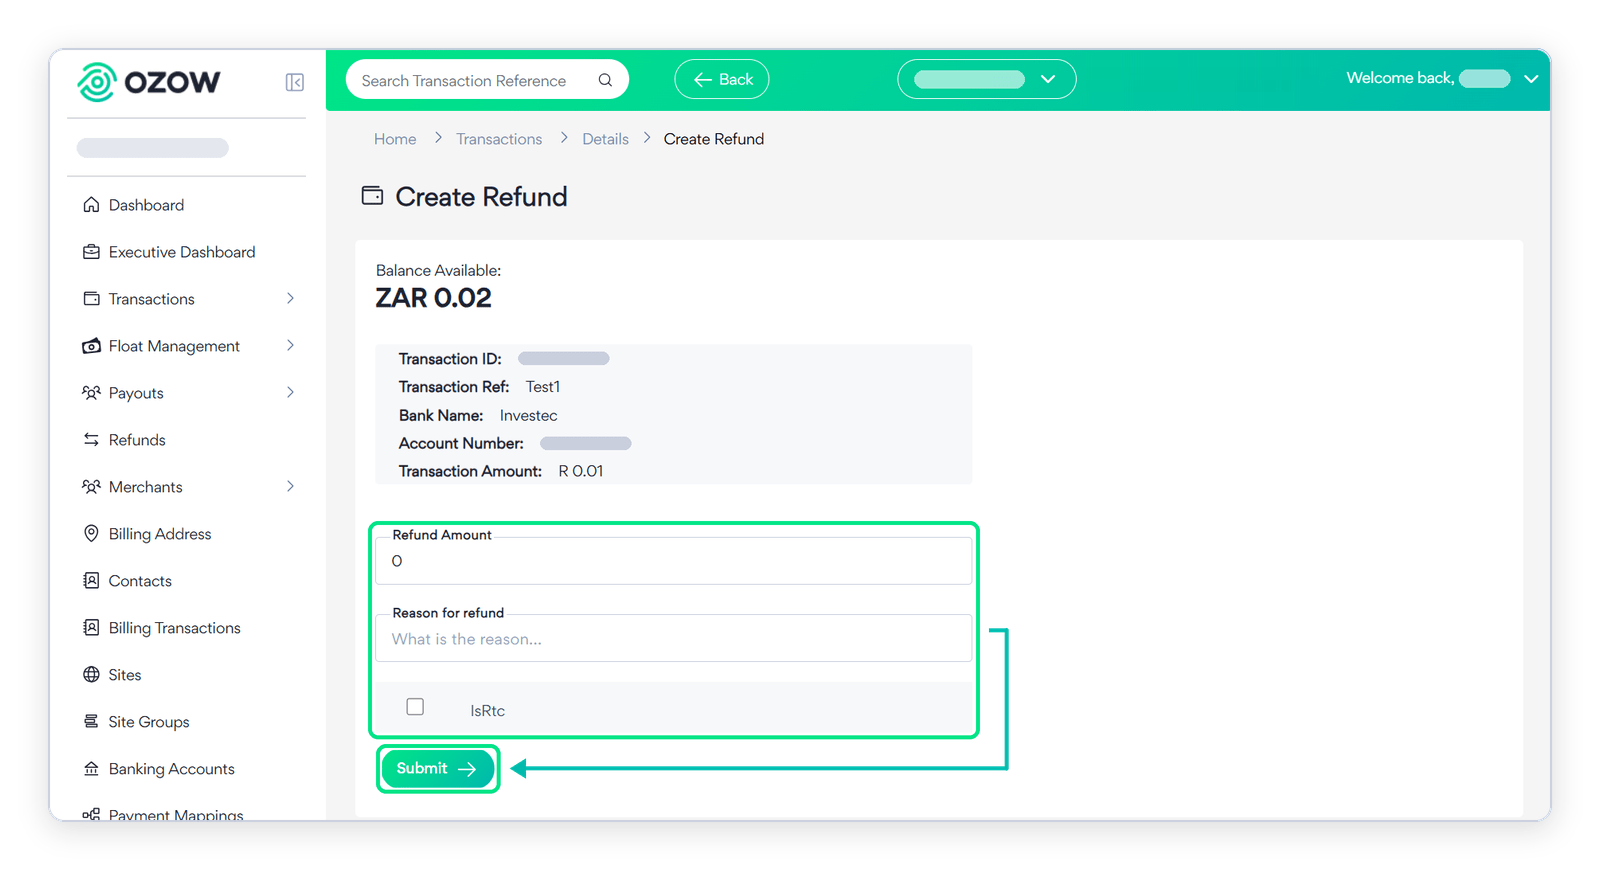
Complete the refund form:
- Refund Amount: enter the amount to refund. You can refund the full amount or a partial amount
- Reason for refund: enter the reason for the refund
- IsRtc: choose how the refund is sent:
- RTCReal-Time Clearing Payments that clear immediately rather than waiting for a batch. A batch run settles at set times through the day; a Real-Time Clearing payment moves the funds between the two bank accounts as it is made, so the recipient can rely on them straight away.PayInc (real-time clearing): the customer receives the refund immediately
- Standard EFT: the customer receives the refund within 1-3 business days
Click Submit.
How much can you refund?
You can refund up to the lower of the amount still refundable on the transaction or your available float balance. For example, if R1,000 is still refundable but your float is R300, you can refund up to R300 until you top up your float.
Partial refunds
You can issue more than one partial refund on the same transaction until the full amount has been refunded. Each successful refund reduces the amount still available to refund.
Step 5: Track the refund
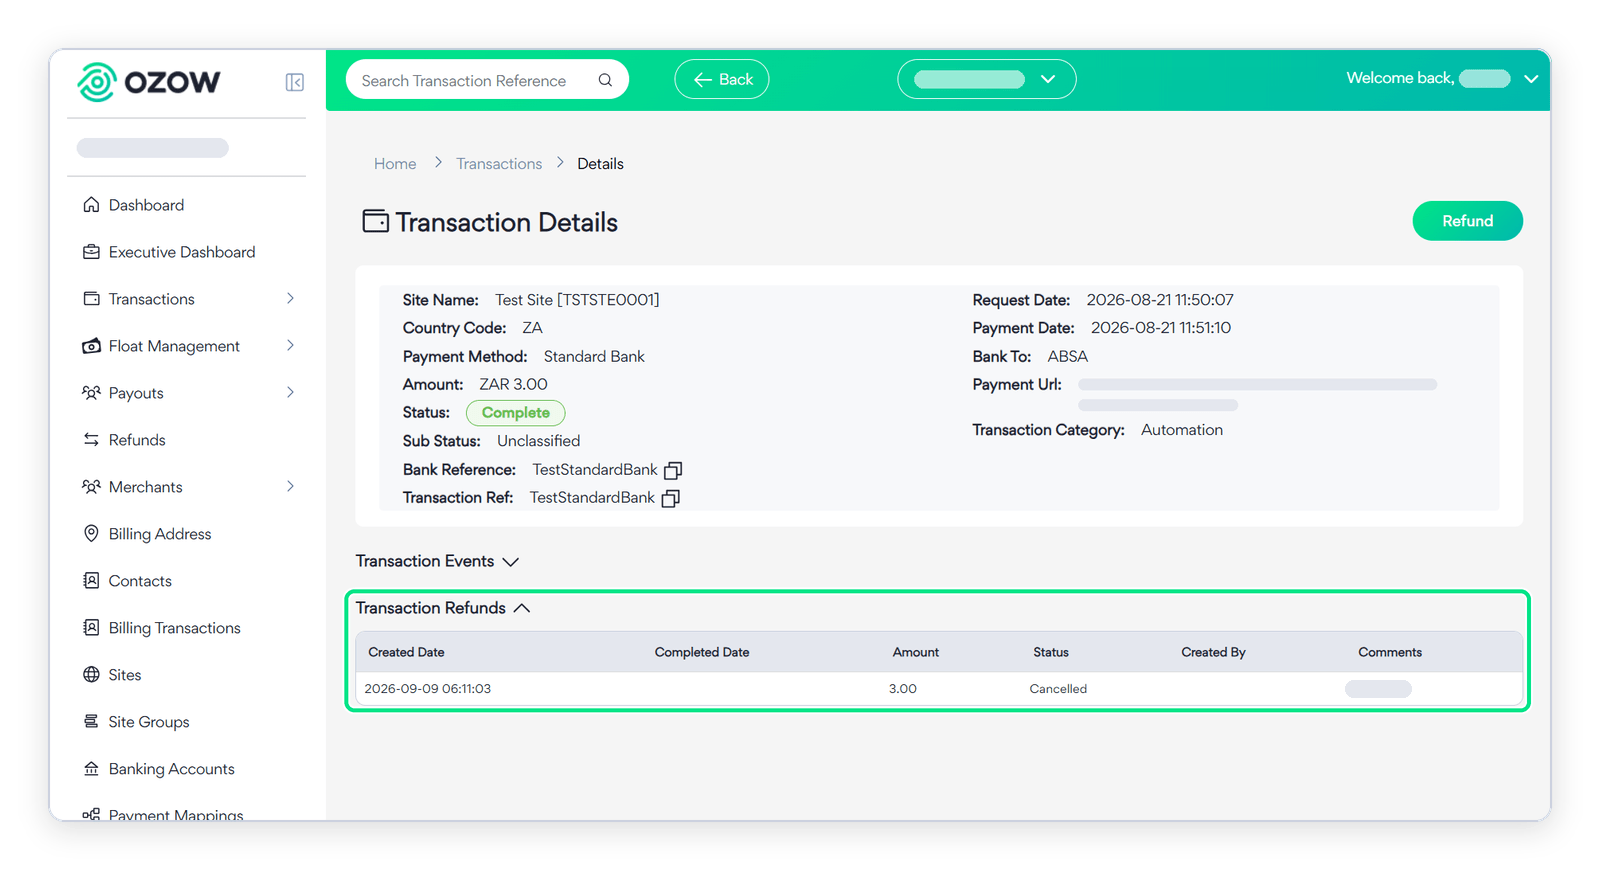
Once submitted, the refund will appear on the transaction details screen under Transaction Refunds. You can track the status of the refund here.
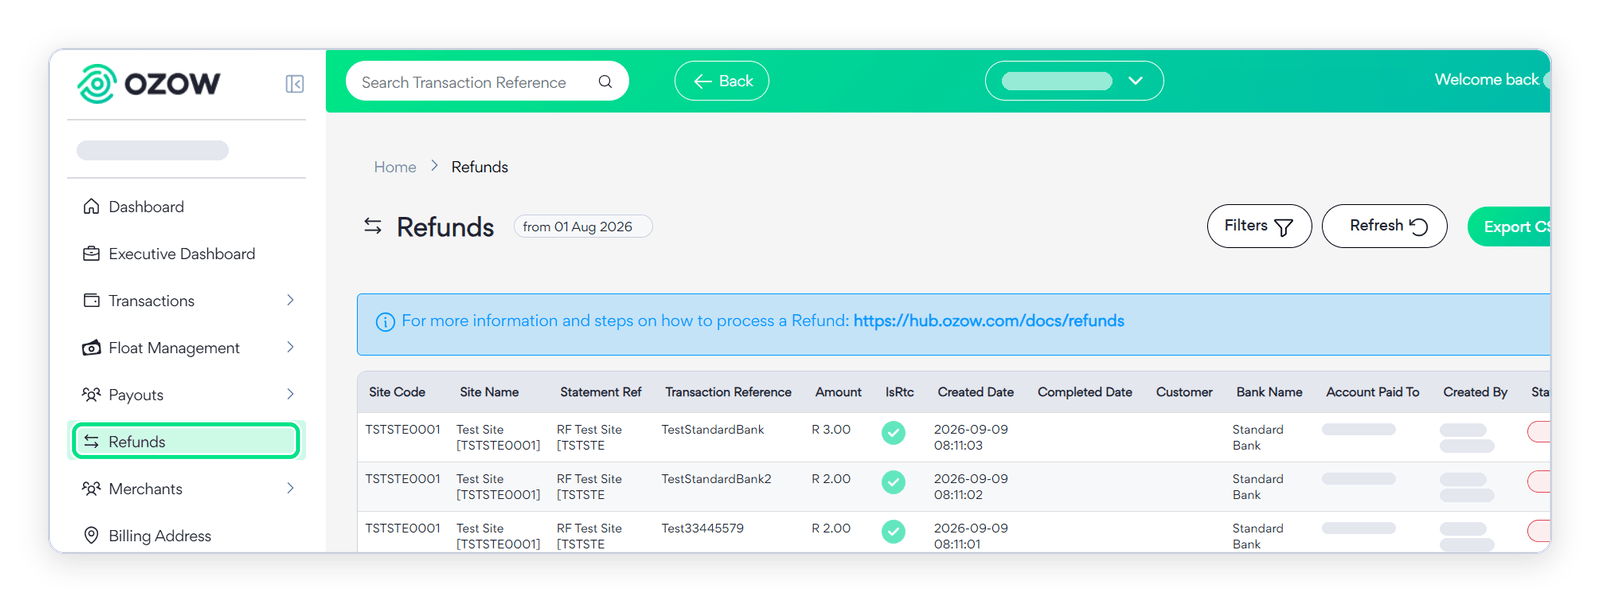
To view all refunds across all transactions, navigate to Refunds in the left-hand navigation menu. Use the date range filter to find the relevant refunds. You will be able to see the status of each refund, for example whether it has completed successfully or failed.
Don't submit a duplicate refund.
If a refund is still being processed, wait for it to complete or fail before submitting another refund on the same transaction. Otherwise the customer could be refunded twice.
If a refund can't be processed
Occasionally a refund can't be processed from the Portal, for example if the details needed to return the money aren't available from the original payment. Contact support@ozow.com with the transaction reference.
Contacting support doesn't change the refund rules. See Refunds for what applies to every refund.
Support
For assistance with refunds, contact support@ozow.com or reach out to your account manager.
Last updated