
Standalone buttons
Show a specific Ozow payment method as its own button at checkout so customers can go straight to the way they want to pay.
On this page7 sections
A standalone button shows one Ozow payment method as its own option on your checkout page, for example Capitec PayCapitec Pay Capitec's own payment method. The payer gives a cellphone, account or ID number rather than card details, and approves the payment in the Capitec app, so no card number and no banking login is ever entered at checkout. It gets its own button rather than sitting inside the bank list, and it requires Customer Identity Verification.Capitec or card. Customers don't land on a general payment page and choose from there. They click the method they recognise and go straight into that payment flow.
Customers who can't see how they can pay at checkout hesitate or leave. Most customers look for logos they know, and a standalone button puts that logo in front of them.
Why use standalone buttons
Instant recognition. A familiar logo shows the customer straight away that their preferred way to pay is accepted.
Brand familiarity builds trust. A payment brand customers know reassures them when they decide whether to pay.
Customers expect to see their method. If customers don't see their payment method, they assume it isn't available. A standalone button removes that doubt.
One less step. The customer skips the method-selection screen, so there's less friction between payment intent and a completed payment.
What it looks like
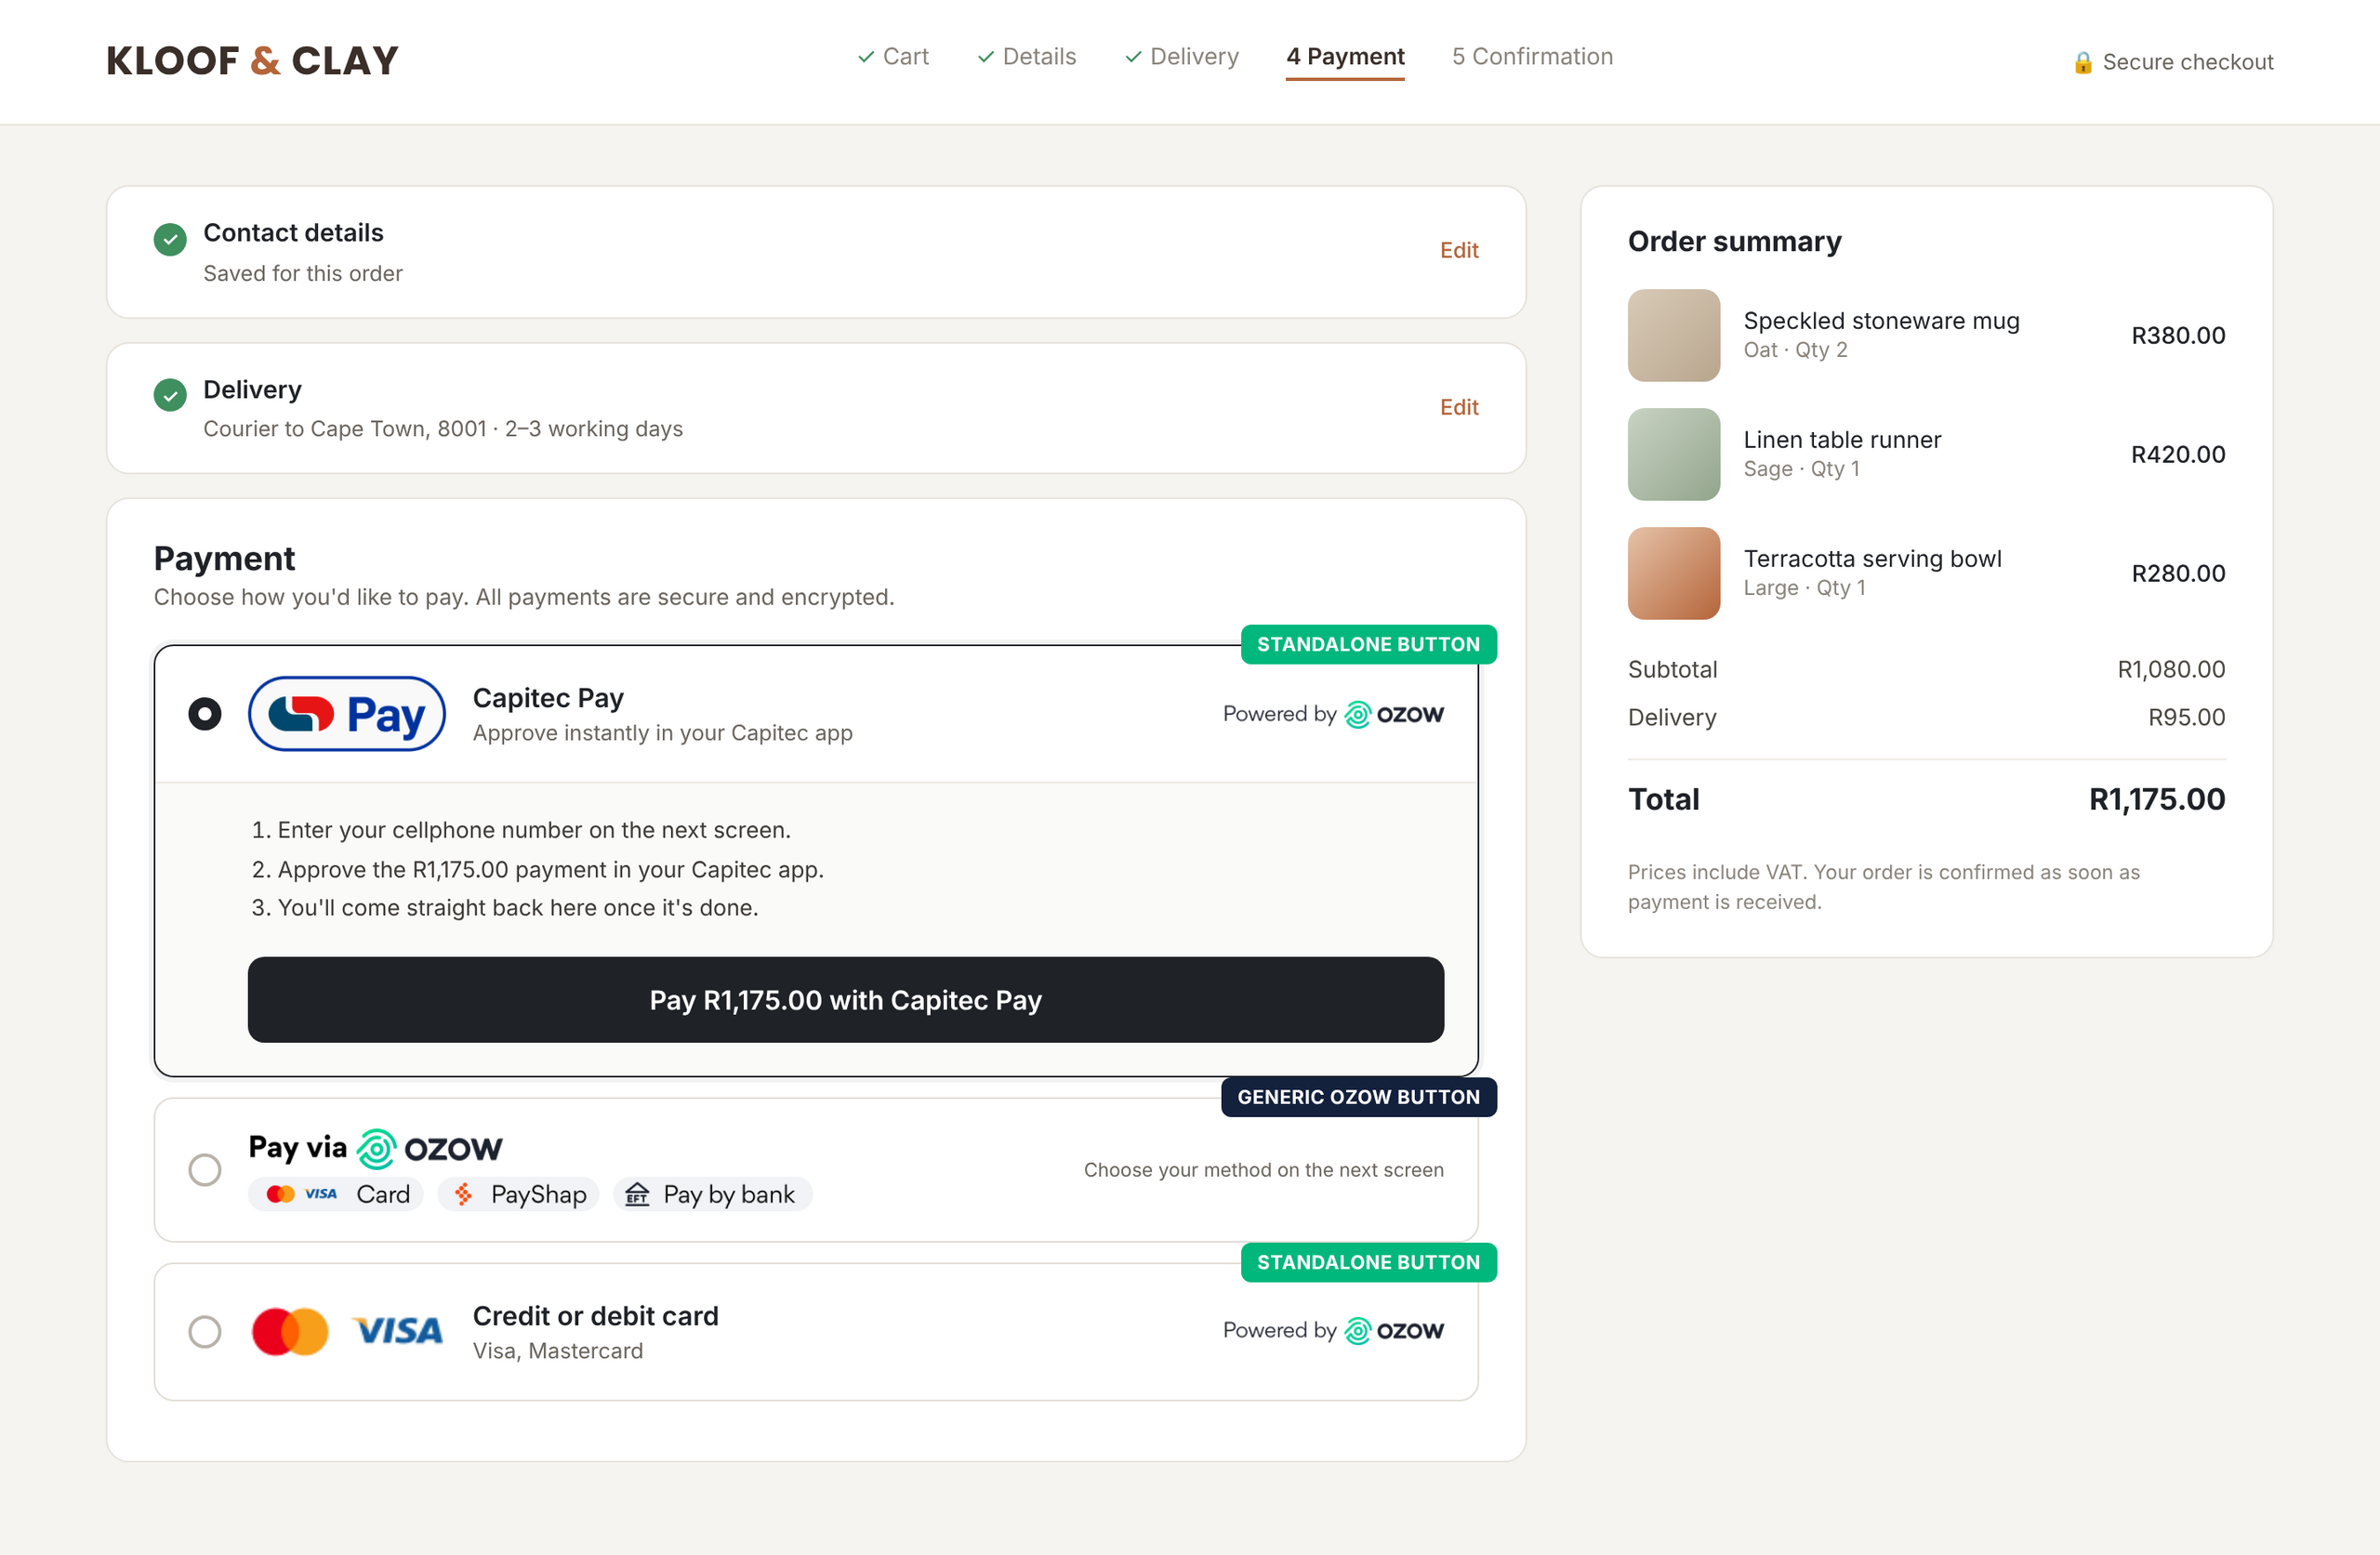
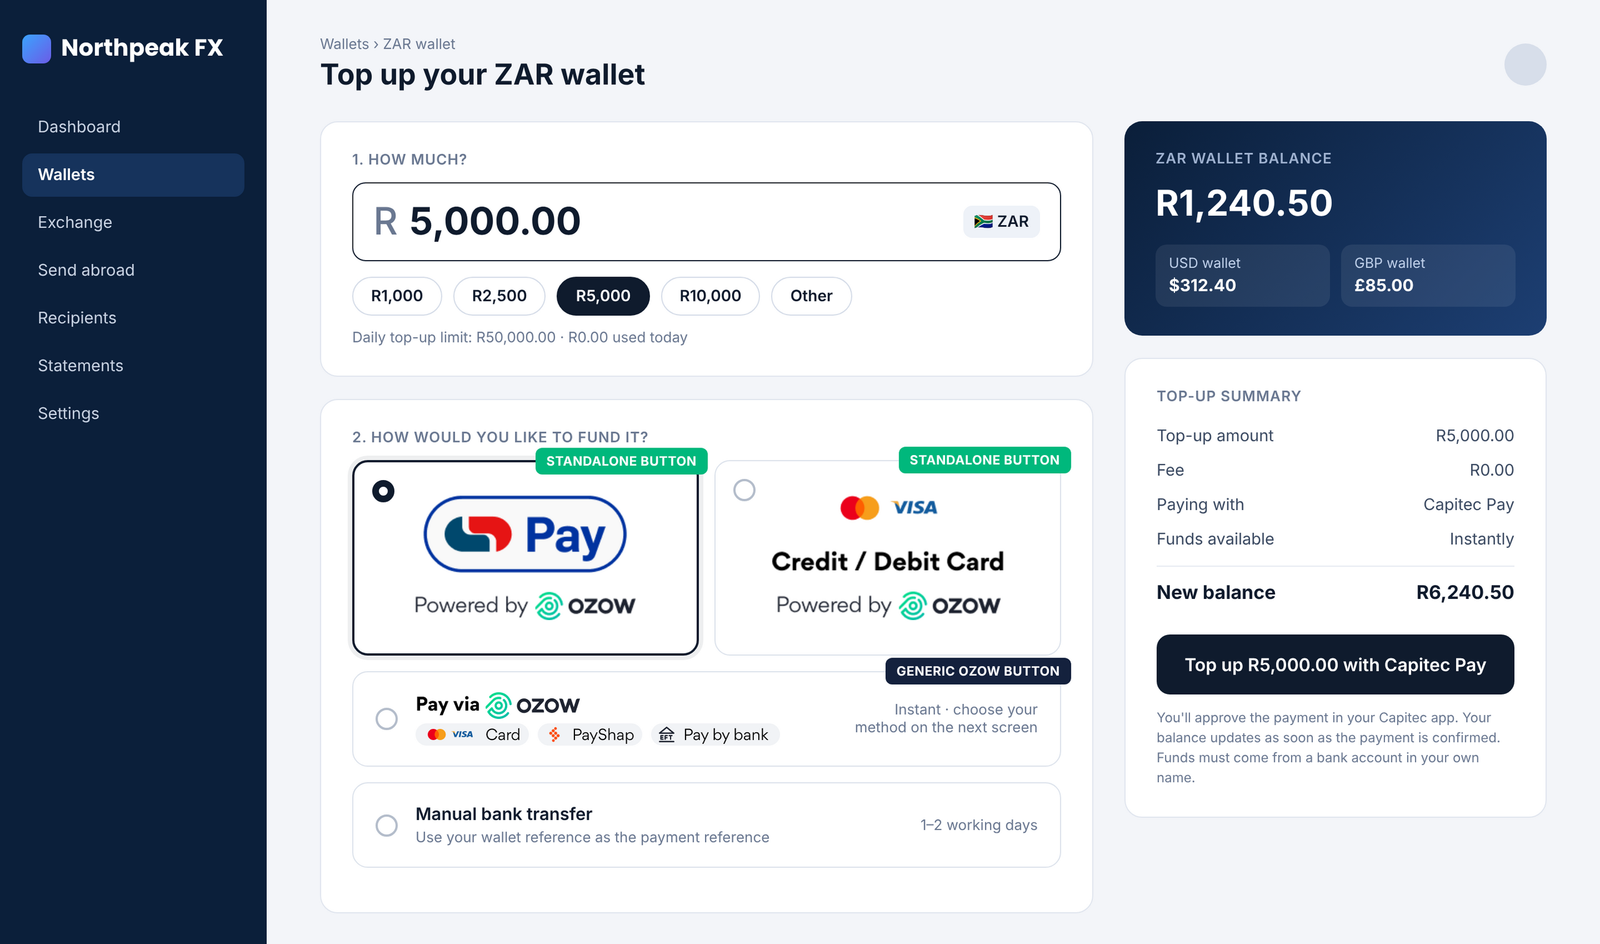
Standalone buttons work anywhere a customer chooses how to pay. Show them alongside the general Ozow button, not instead of it, so customers can still reach every other method enabled on your account.
These examples are illustrations, not real merchants. Always use the official button artwork from Logos and branding.
E-commerce checkout example
Wallet top-up example
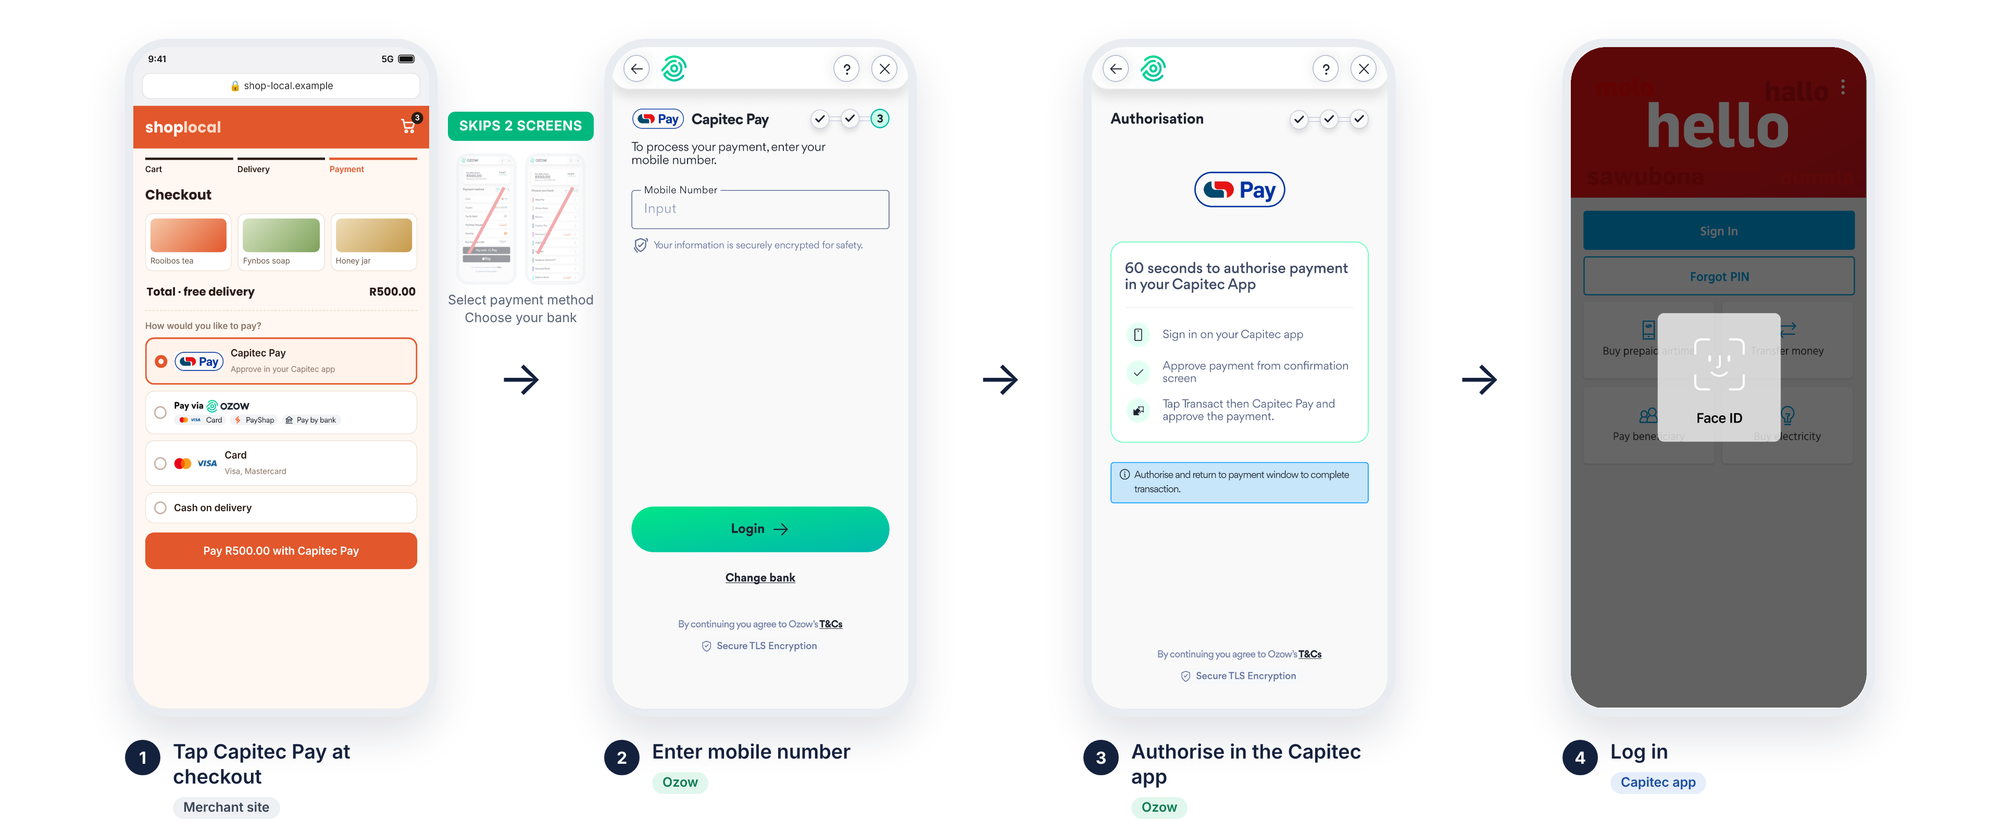
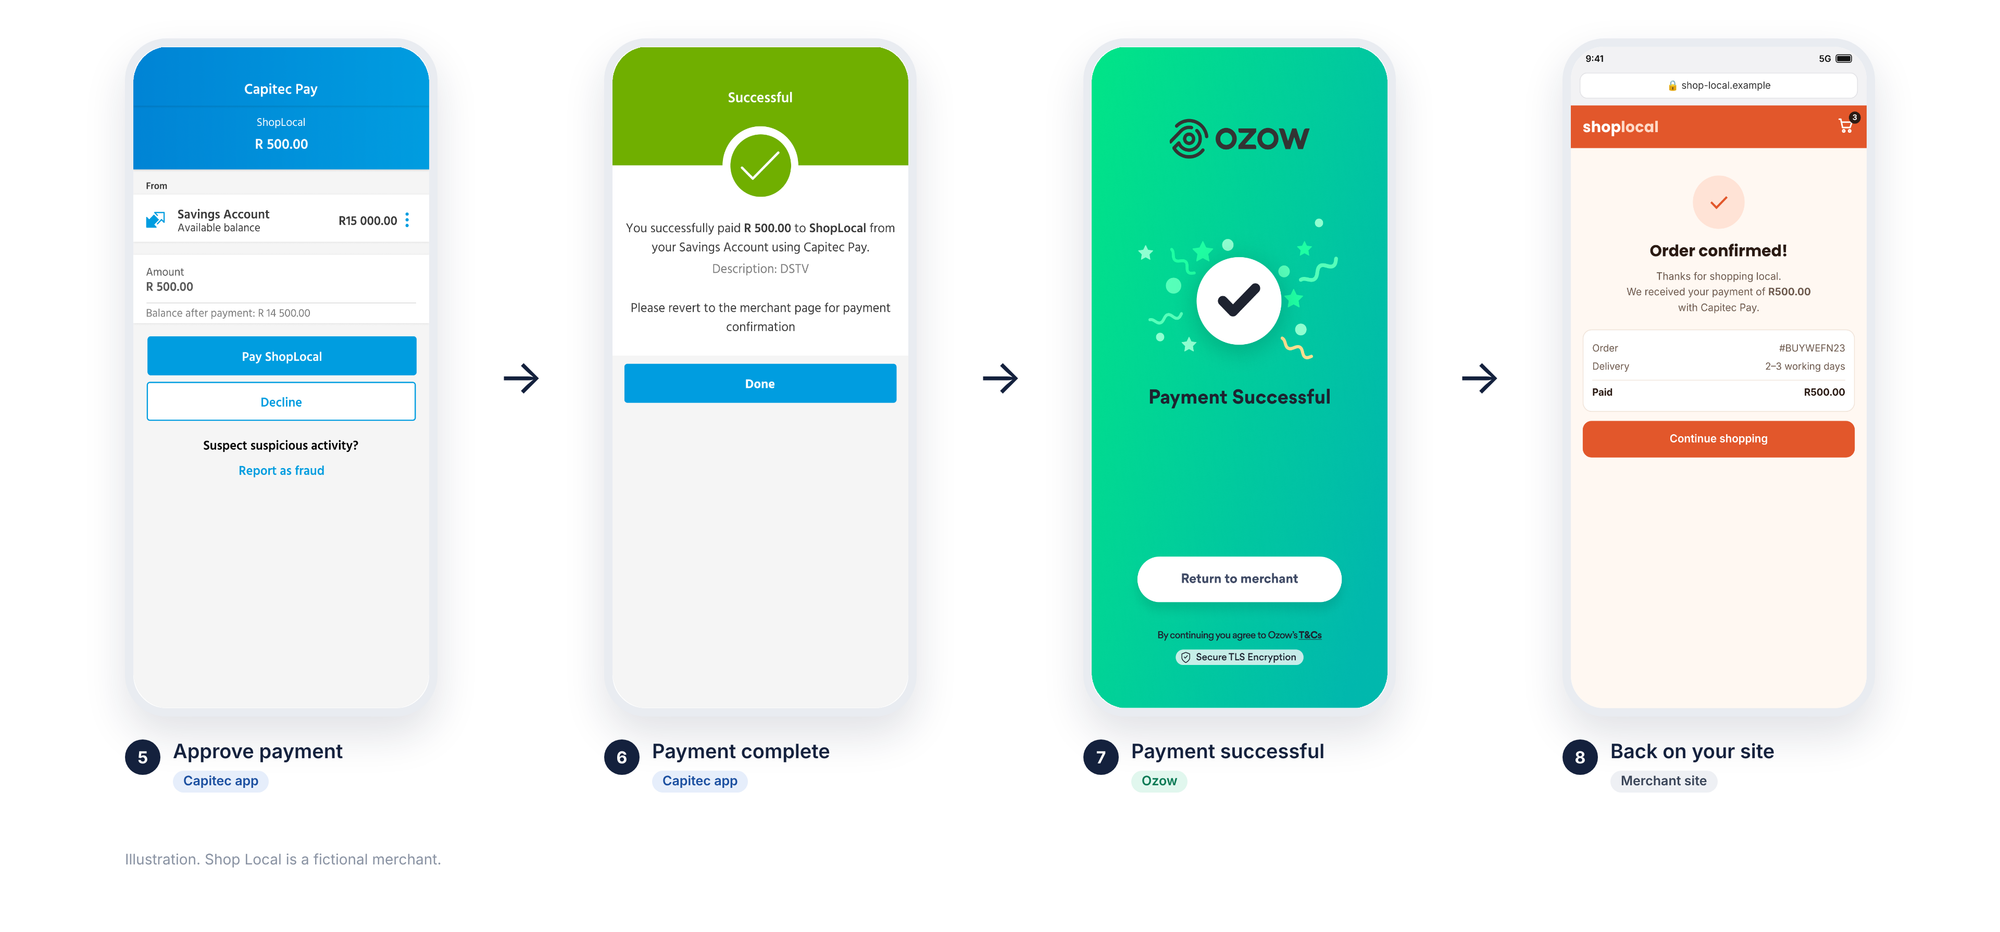
What the customer sees
When a customer taps a standalone button, they skip choosing a payment method and a bank and go straight to that method's screen. Here's the journey for Capitec Pay.
Integration guide
Add institutionId to your Hosted Checkout payment
request. When the institutionId is valid, Ozow sends the customer directly to that payment method.
Each payment method's institutionId is listed on Payment method identifiers.
For the general Ozow button, leave out institutionId. The customer then chooses from all your
enabled methods on the Ozow payment page.
Create the payment with POST https://one.ozow.com/v1/payments (staging: https://stagingone.ozow.com/v1/payments).
{
  "siteCode": "YOUR_SITE_CODE",
  "region": "ZA",
  "amount": {
    "currency": "ZAR",
    "value": 100.00
  },
  "merchantReference": "ORDER-001",
  "expireAt": "2026-12-31T23:59:59Z",
  "returnUrl": "https://yourstore.com/order-complete",
  "institutionId": "YOUR_INSTITUTION_ID"
}
Important
Only show a standalone button after Ozow has confirmed your account is enabled for that payment method. A button for a method you don't have sends customers to a screen where they can't pay.
Apple Pay and Google Pay can't be standalone buttons.
To offer them, choose one of these:
- Use a card standalone button. It opens a payment screen where customers can pay by card, Apple Pay or Google Pay.
- Use Embedded Wallet to show Apple Pay and Google Pay as their own buttons on your checkout.
Next steps
- Confirm your enabled methods. Check your payment flow to see which payment methods are enabled on your account.
- Get the official artwork. Download the button for each method from Logos and branding. Don't recolour, stretch or rotate it.
- Add the buttons and pass the identifier. Place each standalone button next to the general Ozow
button and send the matching
institutionIdin the payment request. - Test before going live. Confirm each button opens the right method.
- Go live.
Last updated